Water heaters work hard to bring us hot baths, clean clothes, and delicious meals – and deserve our thanks and some care for optimal functioning.
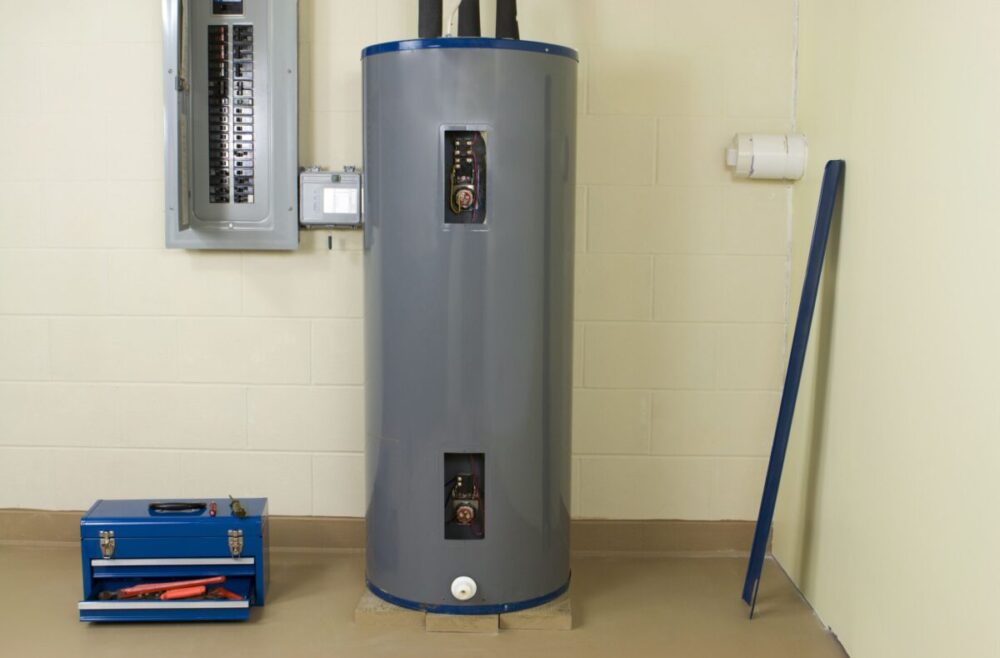
Tank-type water heaters feature an insulated storage tank filled with either gas or electric elements, plus features like a drain valve, pressure-relief valve, and thermostat for control and temperature regulation.
If you’re curious about how to give your water heater the care it deserves and want to dive deeper into its workings, learn more right here.
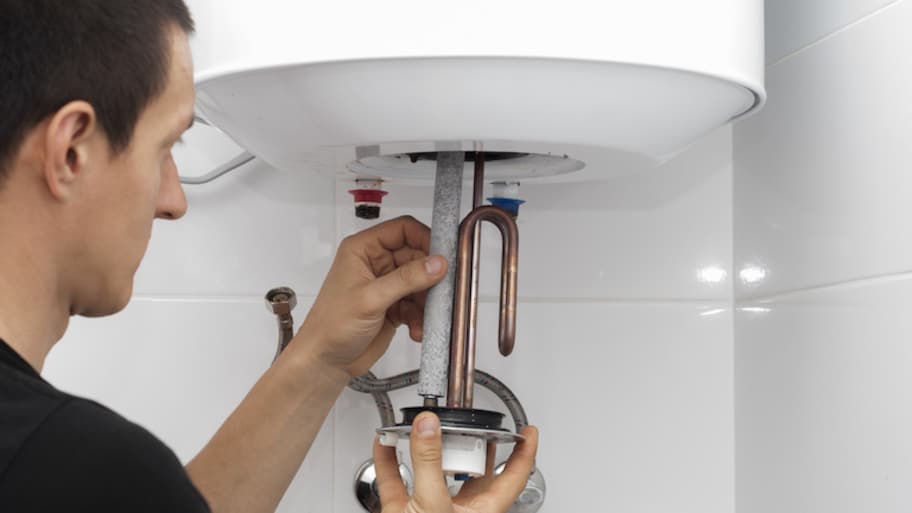
Inspect the Anode Rod
Source: angi.com
Anode rods are essential parts of electric tank-type water heaters. Their job is to keep the middle lining from rusting; however, these anodes may dissolve over time, allowing rust into your water supply. Therefore, changing them out every couple of years is advisable for optimal results.
There are a few telltale signs to indicate it’s time for an anode rod change: one is an unpleasant rotten-egg smell caused by aluminum or magnesium reacting with water to produce sulfur, and two is when hot water contains an unusual gel-like substance due to corrosion of an anode rod, leading to discolored water and discolored anodes.
To inspect an anode rod, shut off power and gas to your water heater before draining some gallons from its tank. Locate and unscrew the hex head at the top of your tank – this may require taking some steps like taking off any plastic caps covering it first – using a 1-1/16 in socket wrench (you may need to use a breaker bar as well), then unscrewing.
Upon taking apart this anode rod, you can inspect its condition to determine whether replacement should occur.
Test the Pressure-Relief Valve
The T&P valve, also known as the Temperature Relief Valve (TRV), should be installed near the top of your water heater and feature a lever that you can lift up or down, as well as a discharge pipe that runs directly downwards, terminating a few inches above the floor.
Its purpose is to open and release steam or water when there’s an excessive build-up of pressure or temperature inside of your tank – it should be checked once annually so as to spot problems before they cause irreparable harm either to yourself or others!
To conduct a valve test, start by switching off your water heater at its circuit breaker for electric models or gas valves on gas-powered ones. Grab a bucket and position it beneath the valve; gently lift or lower it until water comes pouring out. If that occurs, your valve should be working as intended, whereas otherwise, mineral build-up or corrosion may have made its way in and rendered the test unsuccessful.
Jiggle the lever carefully, as hot water may be present inside your tank and may cause your valve to unstick itself. If that doesn’t work, consider calling in a plumber who can replace your valve.
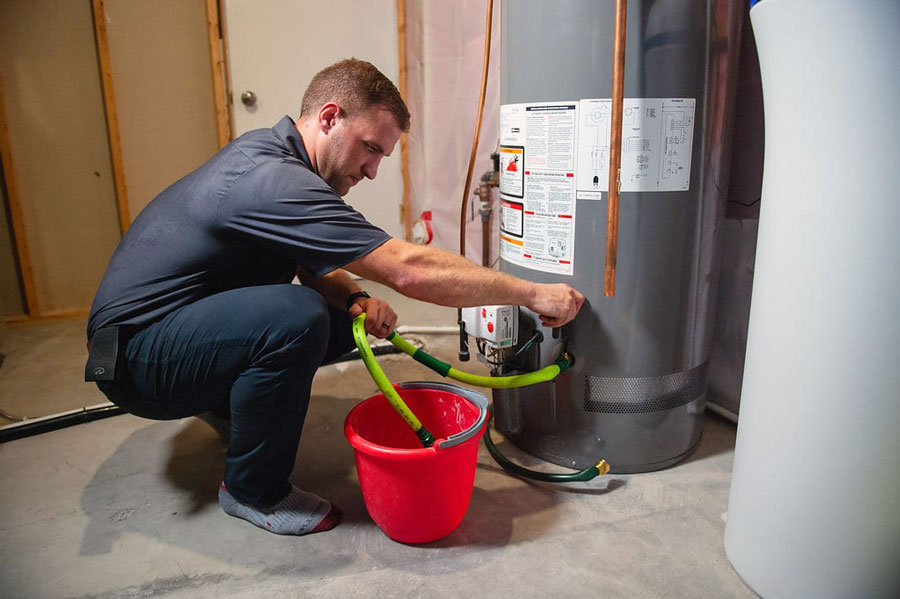
Flush the Tank
Source: 1tomplumber.com
Every once in a while, you should flush your water heater’s tank to rid itself of sediment accumulating within its walls and reduce its lifespan. Filth accumulates as water flows through it, compromising its ability to heat.
To flush your water heater, first turn off its power switch (or gas valve, if applicable) before opening one or more hot water faucets throughout your home – this will prevent vacuum-forming and speed up draining as colder water won’t have to replace hotter ones! This also helps make draining more efficient since hotter waters won’t need replacing by cooler ones as quickly.
Secure a hose to the drain valve at the base of the water heater, open it slowly and begin draining water, taking care not to overfill your bucket or sink with wastewater. Once emptying is complete, close and disconnect both valves before disconnecting your hoses from each tank.
When performing this maintenance task at night when nobody needs hot water, open up the hottest faucet in your home to speed up draining and prevent scalding. Also, use this time to replace anode rods when only bare wire remains and test pressure-relief valves on the top or side of water heaters.
Inspect the Thermostat
The thermostat controls the water coming from your hot water heater, with ideal temperatures set around 120 degrees Fahrenheit or lower to forbid scalding and save on energy costs.
Verifying that it has been set correctly by checking its dial and wiring connections on the back is also key in ensuring everything runs smoothly and stays cohesive and connected over time.
Before inspecting the thermostat, make sure its power source has been disconnected by switching off its breaker. Next, open the outer access panel, remove insulation and plastic covers, unscrew any screws holding panels together and ensure all combustible material has been moved away from it to avoid creating a fire hazard.
It is always wise to find professional advice before working around an electric water heater yourself.
Once the covers and panels have been removed, use one multimeter probe to touch grounded metal on the unpainted side of the tank (or a piece of copper pipe connected to it).
While touching each terminal screw of an upper thermostat with another multimeter probe – the reading should read zero ohms if functioning normally. Otherwise, if the reading is one, it indicates continuity that requires the replacement of this thermostat.
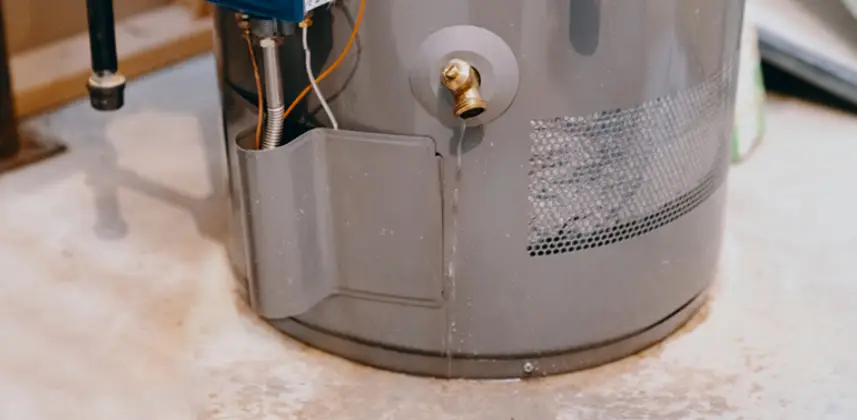
Check for Leaks
Source: mrrooter.com
Leaking water heaters can lead to costly damage and energy waste. Regularly inspect your water heater for any signs of leakage to catch and address potential issues early. Begin by visually examining the area around the base of the heater, checking for puddles or dampness. Additionally, inspect the pipes and fittings connected to the unit for any signs of dripping or moisture. If you notice any leaks, it’s crucial to act promptly.
Leaks can occur due to loose connections, corroded pipes, or a faulty pressure relief valve. Tighten any loose fittings and replace any damaged components. If you’re unsure about the source of the leak or how to fix it, consider consulting a professional plumber to ensure your water heater remains in excellent working condition.
Sediment Build-Up Prevention
Preventing sediment build-up in your water heater is essential for maintaining its efficiency and longevity. Sediment can accumulate at the bottom of the tank over time, reducing the heater’s heating capacity and causing overheating issues. To prevent sediment build-up, consider installing a sediment filter or a water softener if you have hard water.
Additionally, you can periodically flush the tank to remove any accumulated sediment. To do this, follow the manufacturer’s instructions or seek guidance from a professional plumber. Regular tank flushing can help your water heater operate more efficiently, extend its lifespan, and reduce energy consumption, ultimately saving you money on utility bills.