
Did you know that Adobe Premiere Pro has a wonderful tool that allows you to trim your clips with extra precision?
Well, it’s more of a set of tools, actually. The trim mode is a perfect solution to optimize and overall improve your video editing workflow. This display has many features ‒ the most important of them is the ability to trim your clips and transitions almost frame by frame: https://studioplugins.net/product/premiere-transitions.
It’s weird that not everyone knows about this mode ‒ it’s an ultimately useful tool! Unfortunately, you still have to find it in the menu as it isn’t displayed by default.
Let’s see how you can take advantage of the trim mode.
Source: macprovideo.com
Let’s set up the trim mode
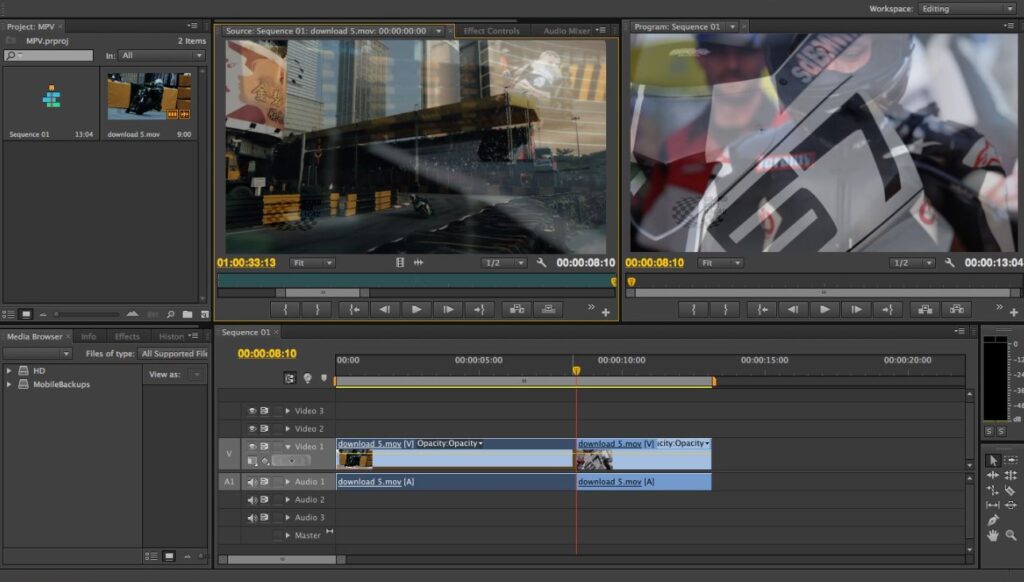
The main tool there is a precise edition of the edit point. To do that, you have to enable the program monitor in the trim mode configuration. It’s really easy to do: choose the “Sequence” option, choose “Trim Edit”, and you’ll see the program monitor with a two-screen display. Also, the play head will jump to the closest exit point on your timeline.
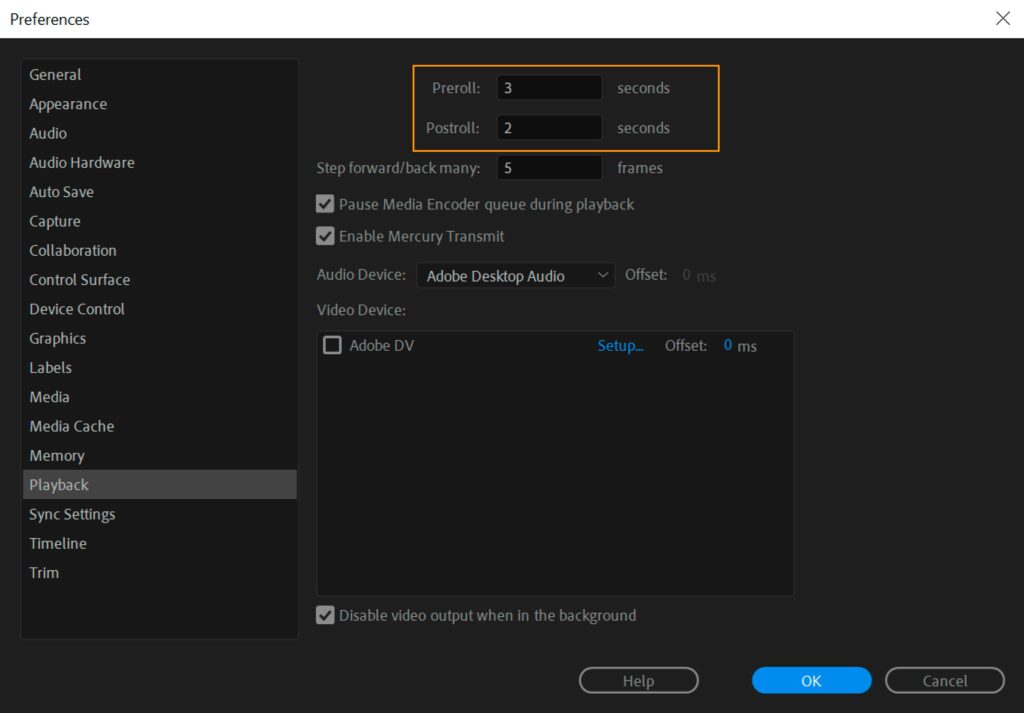
Why would you need the program monitor? Well, you’ll find it is a really convenient tool ‒ you can display every change to the edit point in real-time thanks to the playback loop. Also, the mode has a few useful buttons: trimming forward or backward, and the button for the default transition application. And if you want to change the number of frames to be trimmed, simply find this option in the Premiere Pro preferences menu under the “Trim” tab.
Getting to trim clips
So, what’s so special about the trim mode? The answer is pretty simple” the user interface is perfect there. You can trim and adjust your clips with just a few clicks and drags on the display. Also, a few trimming tools are available in this mode ‒ both basic and ripple trim as well as the rolling trim tool. You have two displays to overview your trimming changes: the left one shows you the last frame of the previous clip, and the right one shows the very first frame of the next clip.
Using shortcuts in this mode is also very convenient for your workflow. You can set the keyboard shortcuts by yourself, but remember that by default you can use the combination of Ctrl and the left or right button.
This kind of configuration is perfect if you need some help in adjusting trimmed clips and editing them quite precisely. The trim mode has everything for fast and convenient editing ‒ you only have to enable this display in your Adobe Premiere Pro preferences.
Source: adobe.com
Types of Trim Modes
There are three trim modes in Adobe Premiere Pro: regular, ripple, and rolling. Each has its own set of benefits and drawbacks.
The regular trim mode works the same way as the default trim mode in most video editing software: it automatically balances the amount of video on either side of the cursor to create a smooth transition. However, the regular trim mode doesn’t always produce the best results. For example, if you have a long clip with lots of extraneous material on both sides of the cursor, the regular trim mode may not be able to properly balance the video and may result in choppy or unpolished footage.
Ripple trim mode works a bit like a waveform monitor in audio editing software: it displays a waveform representing the video on one side of the cursor and allows you to drag it down or up to adjust the balance between that side and the other. Ripple trim mode is great for adjusting small amounts of video without affecting other parts of your clip; for example, if you want to remove just one frame from the middle of your clip without affecting any surrounding footage.
However, ripple trim mode can also be tricky to use if your footage consists mostly of smooth transitions or if there’s a lot of background noise. In these cases, ripple trim mode may struggle to properly identify which portion of the clip should be moved and may end up moving too much or too little video.
Finally, the rolling trim mode works a bit like a waveform monitor in audio editing software: it displays a waveform representing the video on one side of the cursor and allows you to drag it down or up to adjust the balance between that side and the other. However, instead of displaying a waveform for each individual piece of video, rolling trim mode adds a gaussian (or “rolling”) blur to all the video on both sides of the cursor. This makes it easier to see which areas of your clip need adjustment and eliminates the need for precise cursor movements.
Rolling trim mode is great for making large-scale adjustments to your clip. For example, if you want to smooth out a choppy or uneven transition, or if you want to remove all the background noise from a scene without affecting any important footage. However, the rolling trim mode can be difficult to use if your footage consists mostly of smooth transitions or if there’s a lot of background noise. In these cases, the rolling trim mode may struggle to properly identify which portion of the clip should be moved and may end up moving too much or too little video.

Source: kingston.com
What is dynamic trimming video editing?
Dynamic trimming is a video editing technique that rapidly takes a viewer through a flurry of images. This technique can be used to quickly move between different scenes or clips in your video without having to pause and search for the correct clip. Dynamic trimming is helpful for time-sensitive projects, such as news reports or short videos where you need to keep the viewer engaged.
Conclusion
We hope that this article has shown you how to use Adobe Premiere Pro’s trim mode to efficiently clean up your footage. Trim mode is a great tool for precision editing and can help you get the most out of your footage. By learning how to use trim mode, you will be able to greatly improve the quality of your videos and make sure that every frame is worth including in your final product. Thanks for reading!